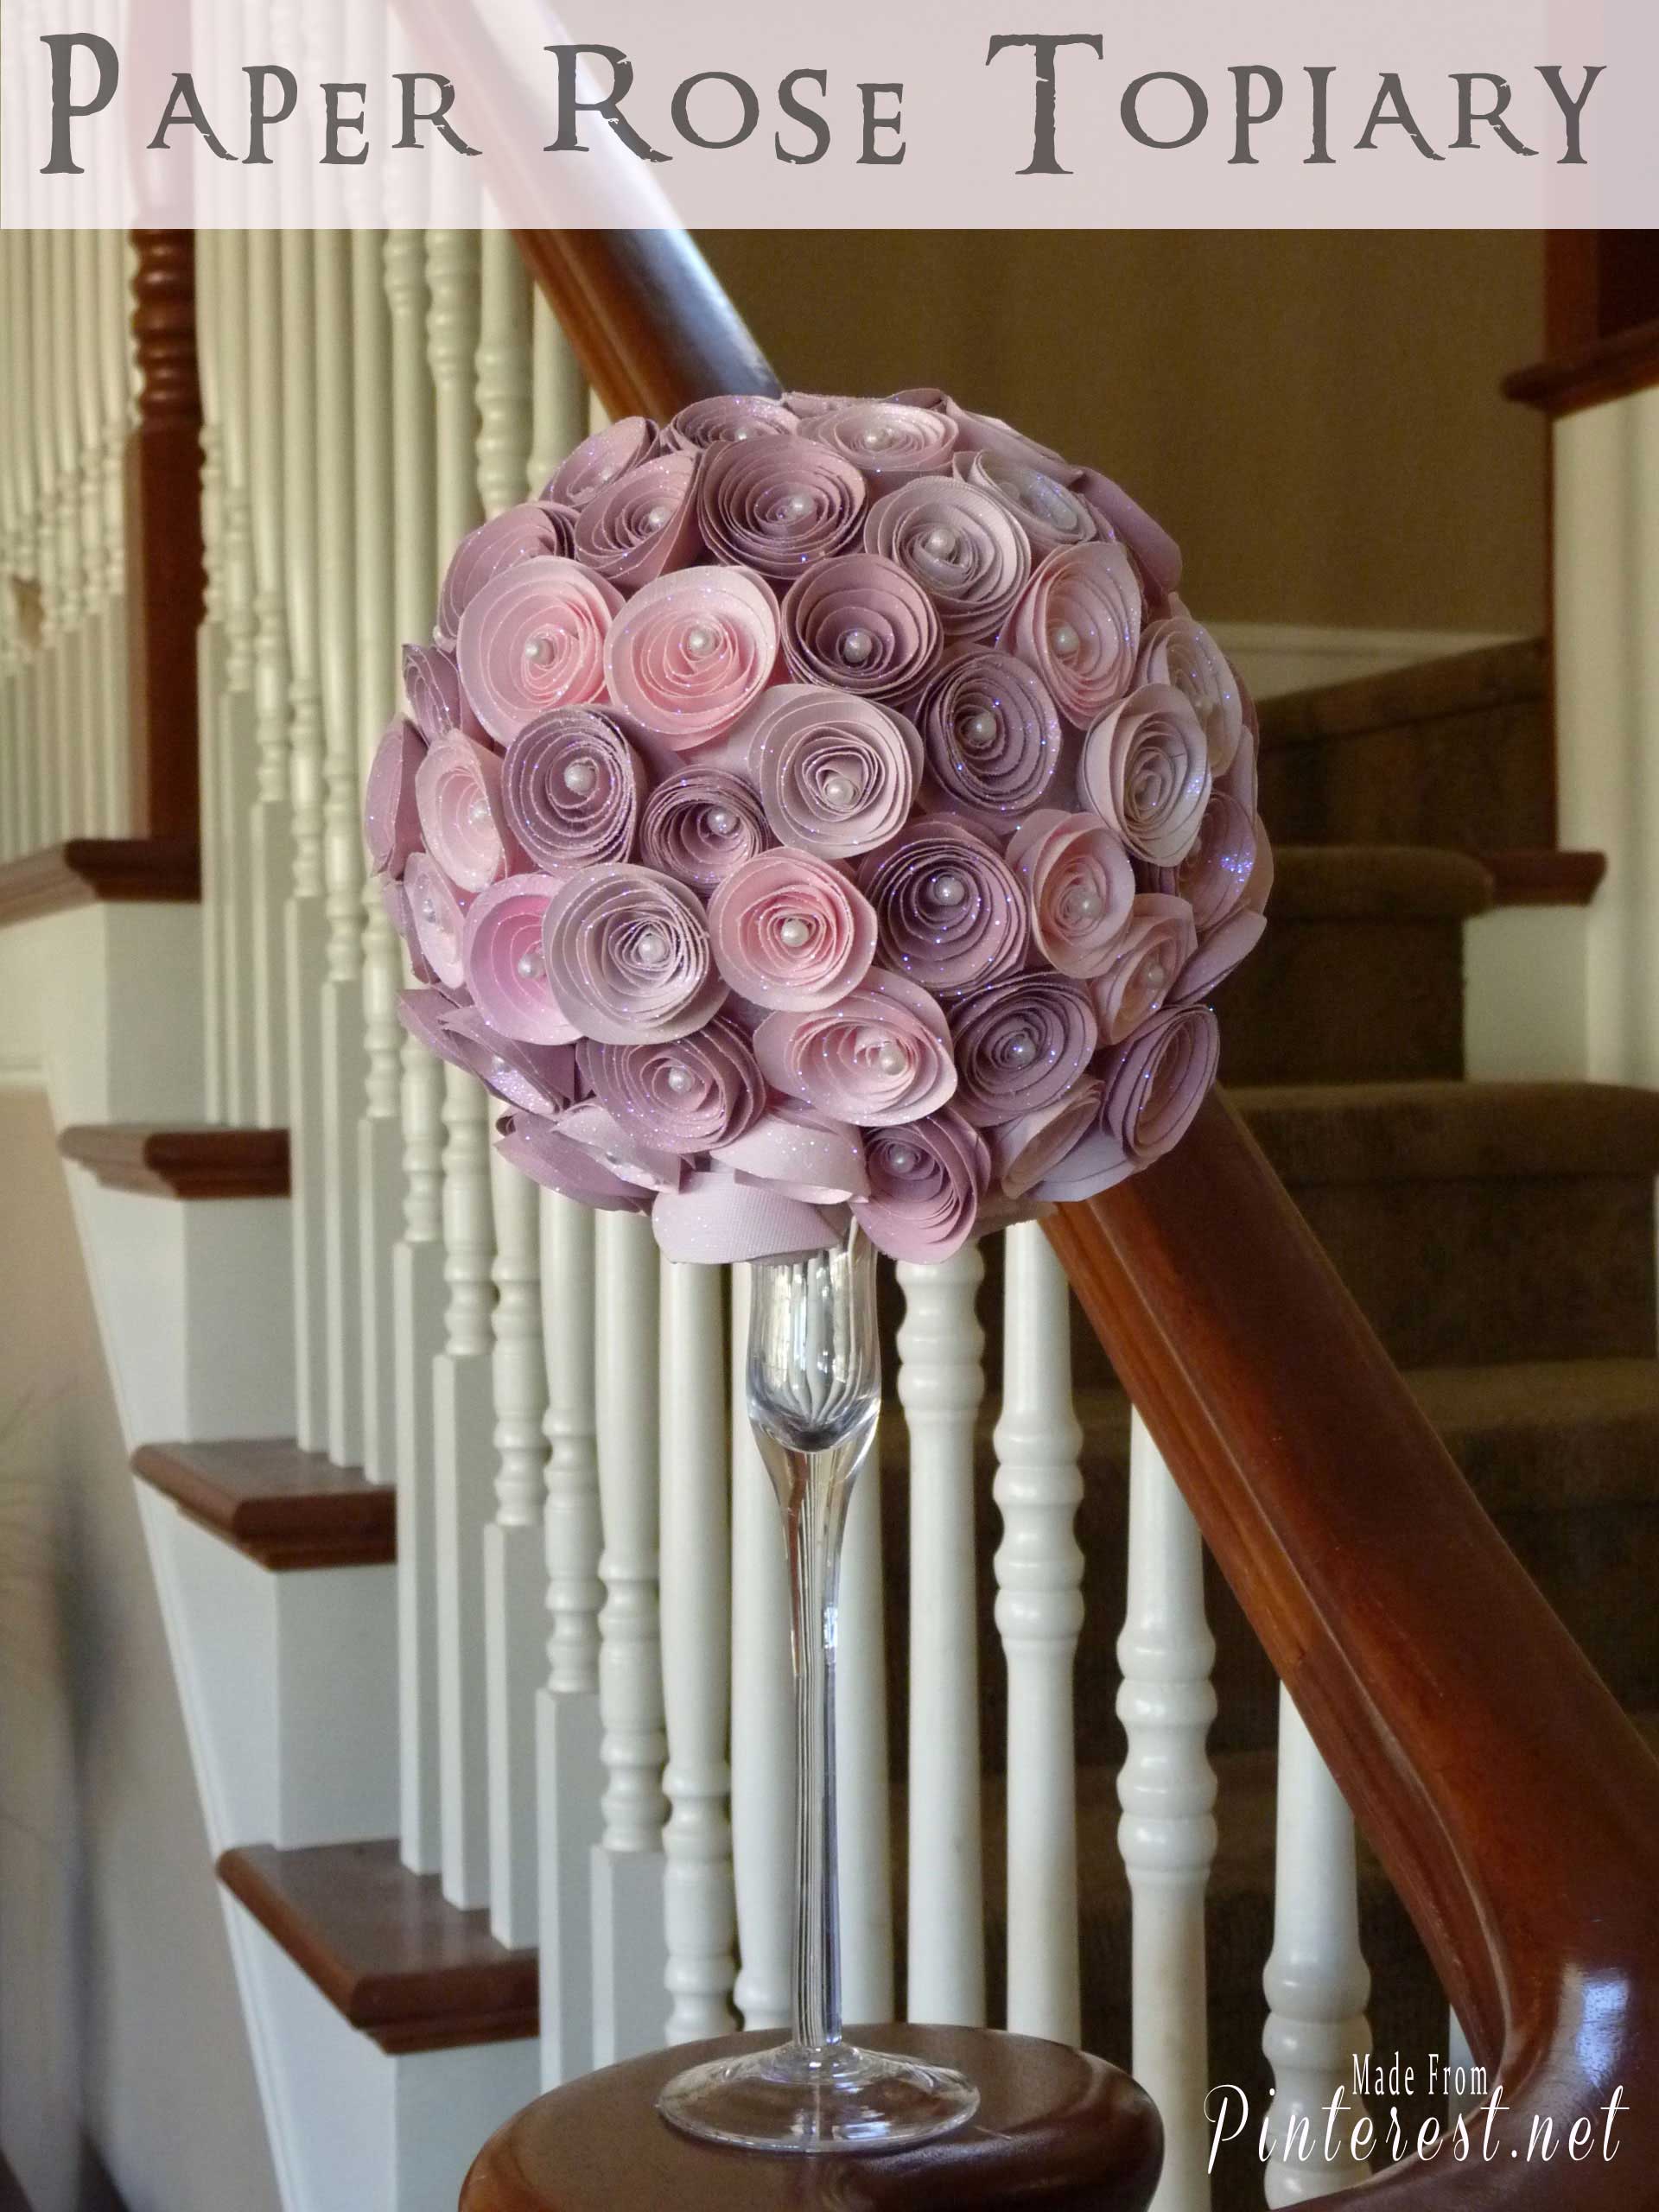
One of my favorite things about doing our blog is that I get things done, finito, completed. Before blogging, I tended to be great at starting projects, but not as great at finishing them. It’s amazing how motivating a deadline can be! This Paper Rose Tutorial is a perfect example. I started it last year around this time, got busy with life and it ended up halfway done in the “craft closet”. When I went looking for a good pin to test for Valentine’s Day, I remembered this project. It was sitting right where I had left it. Here is the original pin/tutorial from Tammy at Life in Pictures.
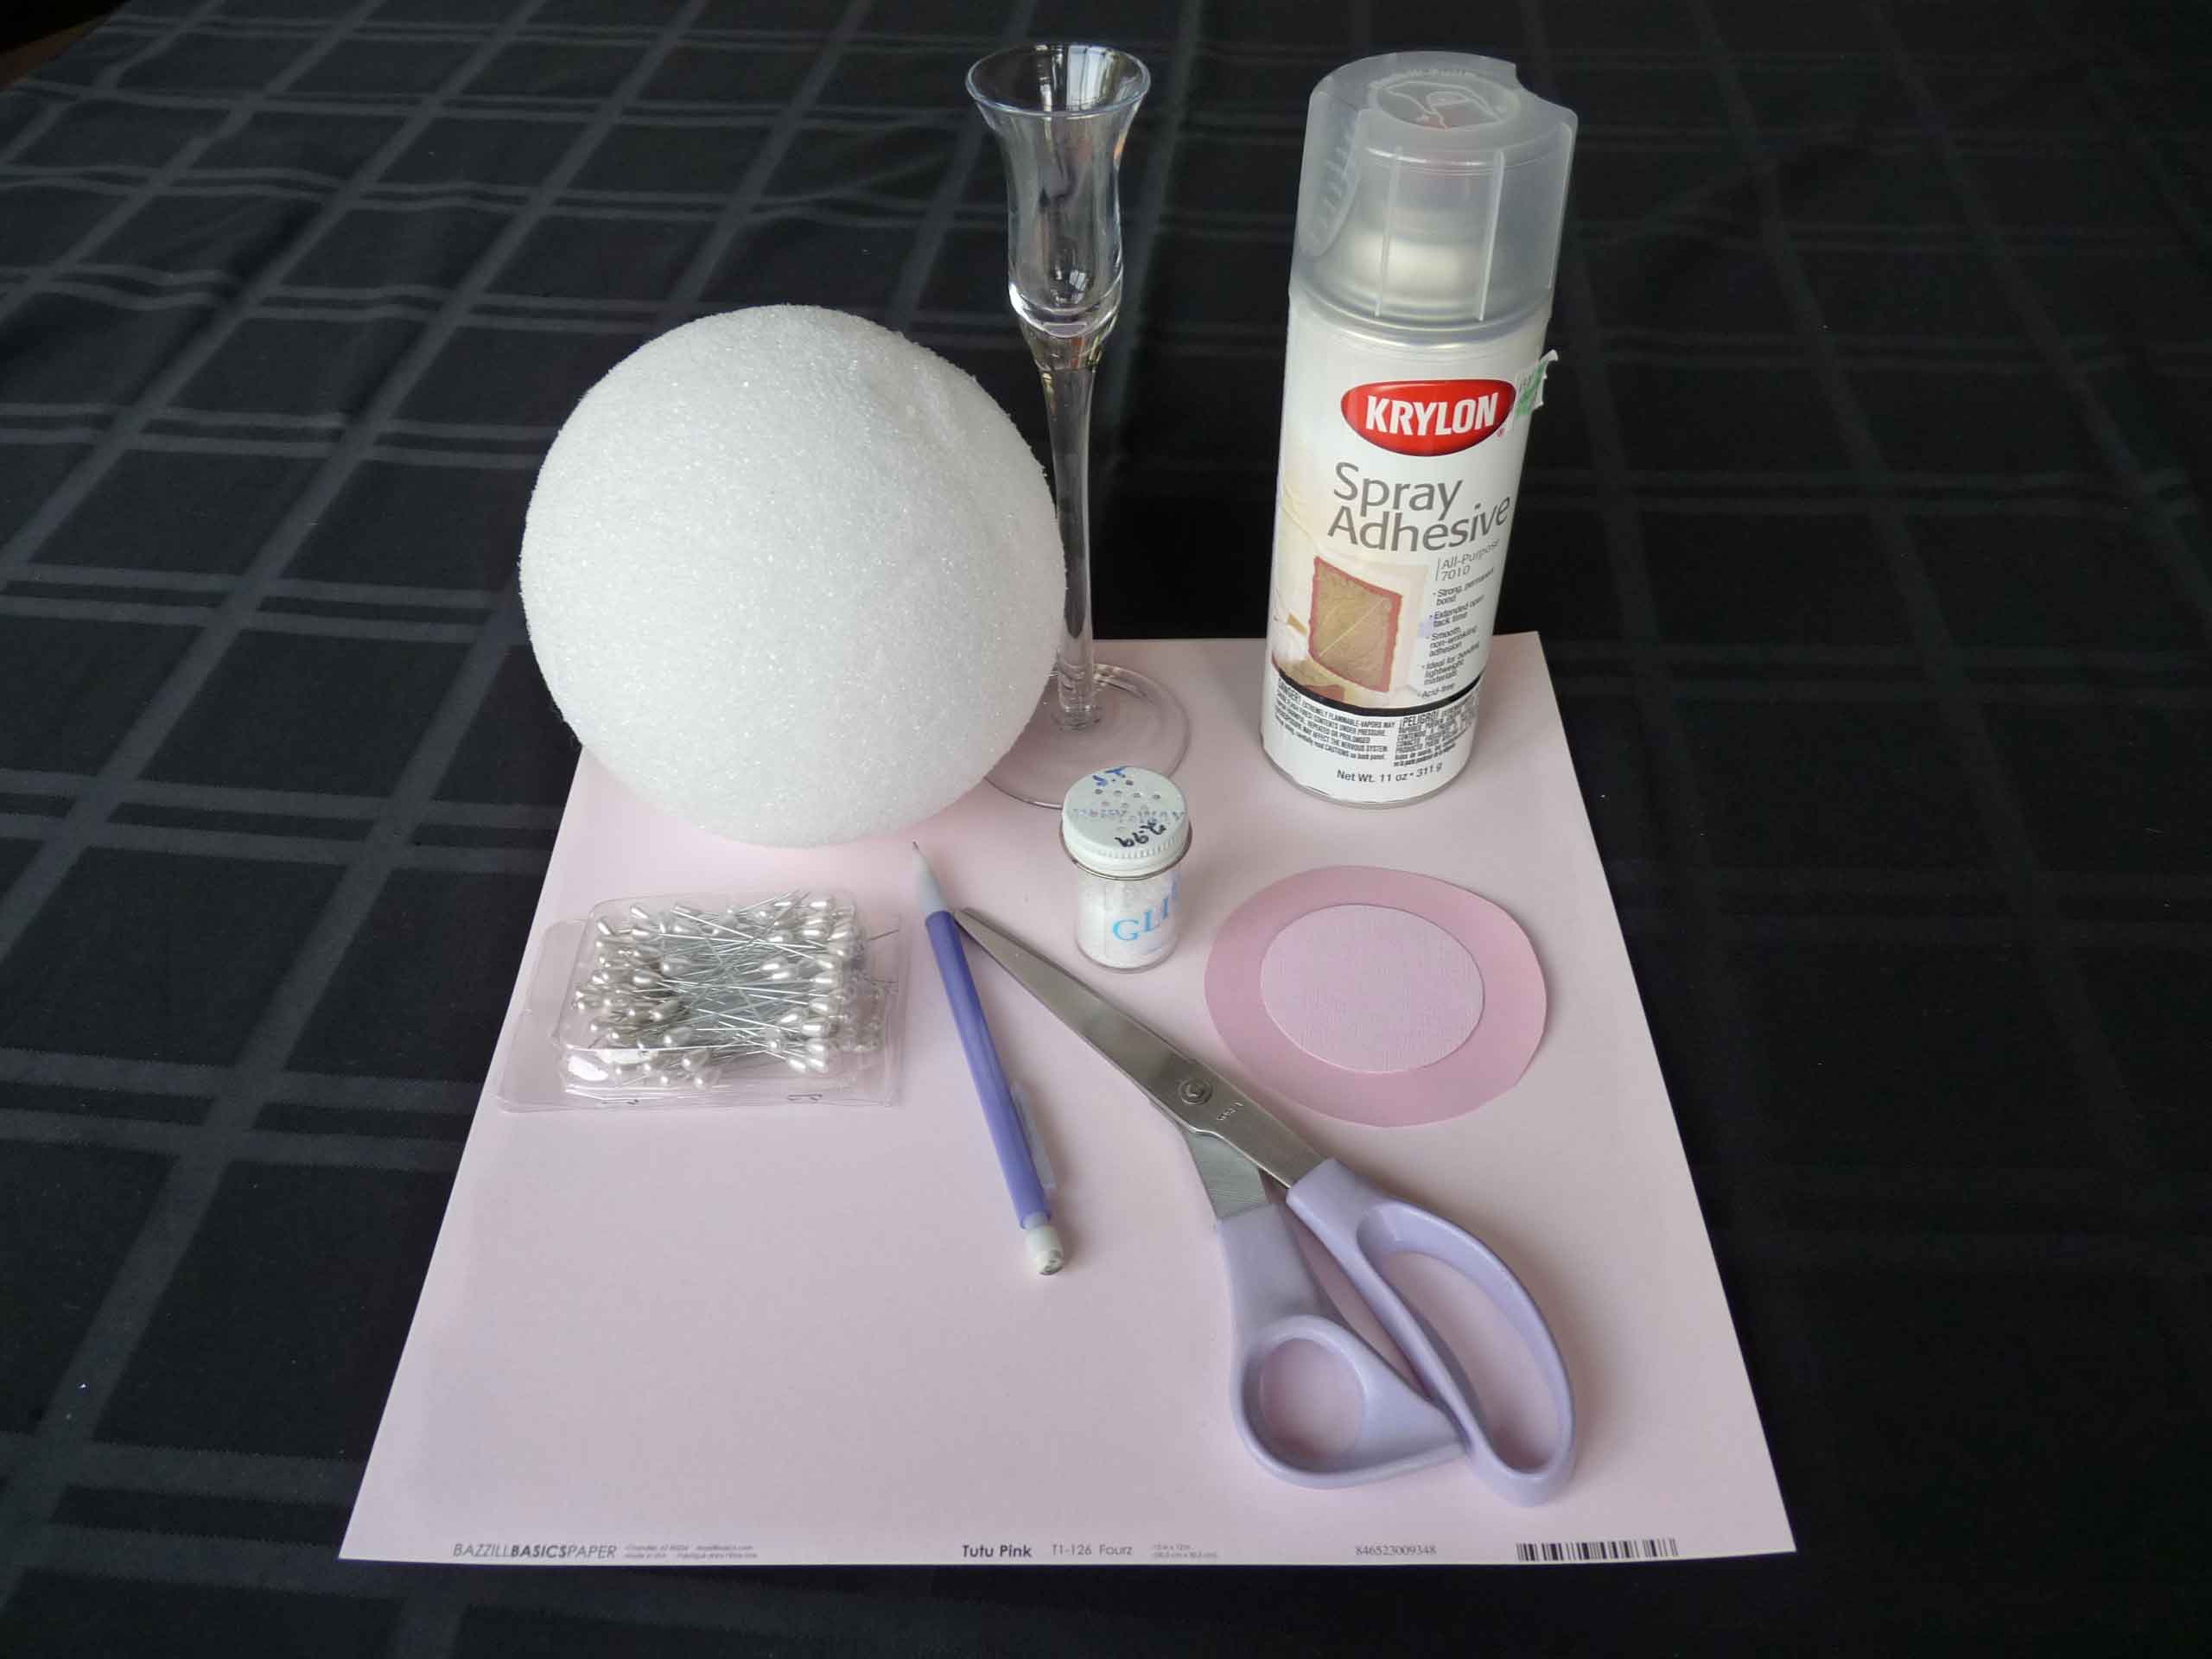
Supplies – detailed list is at the bottom of the post 🙂
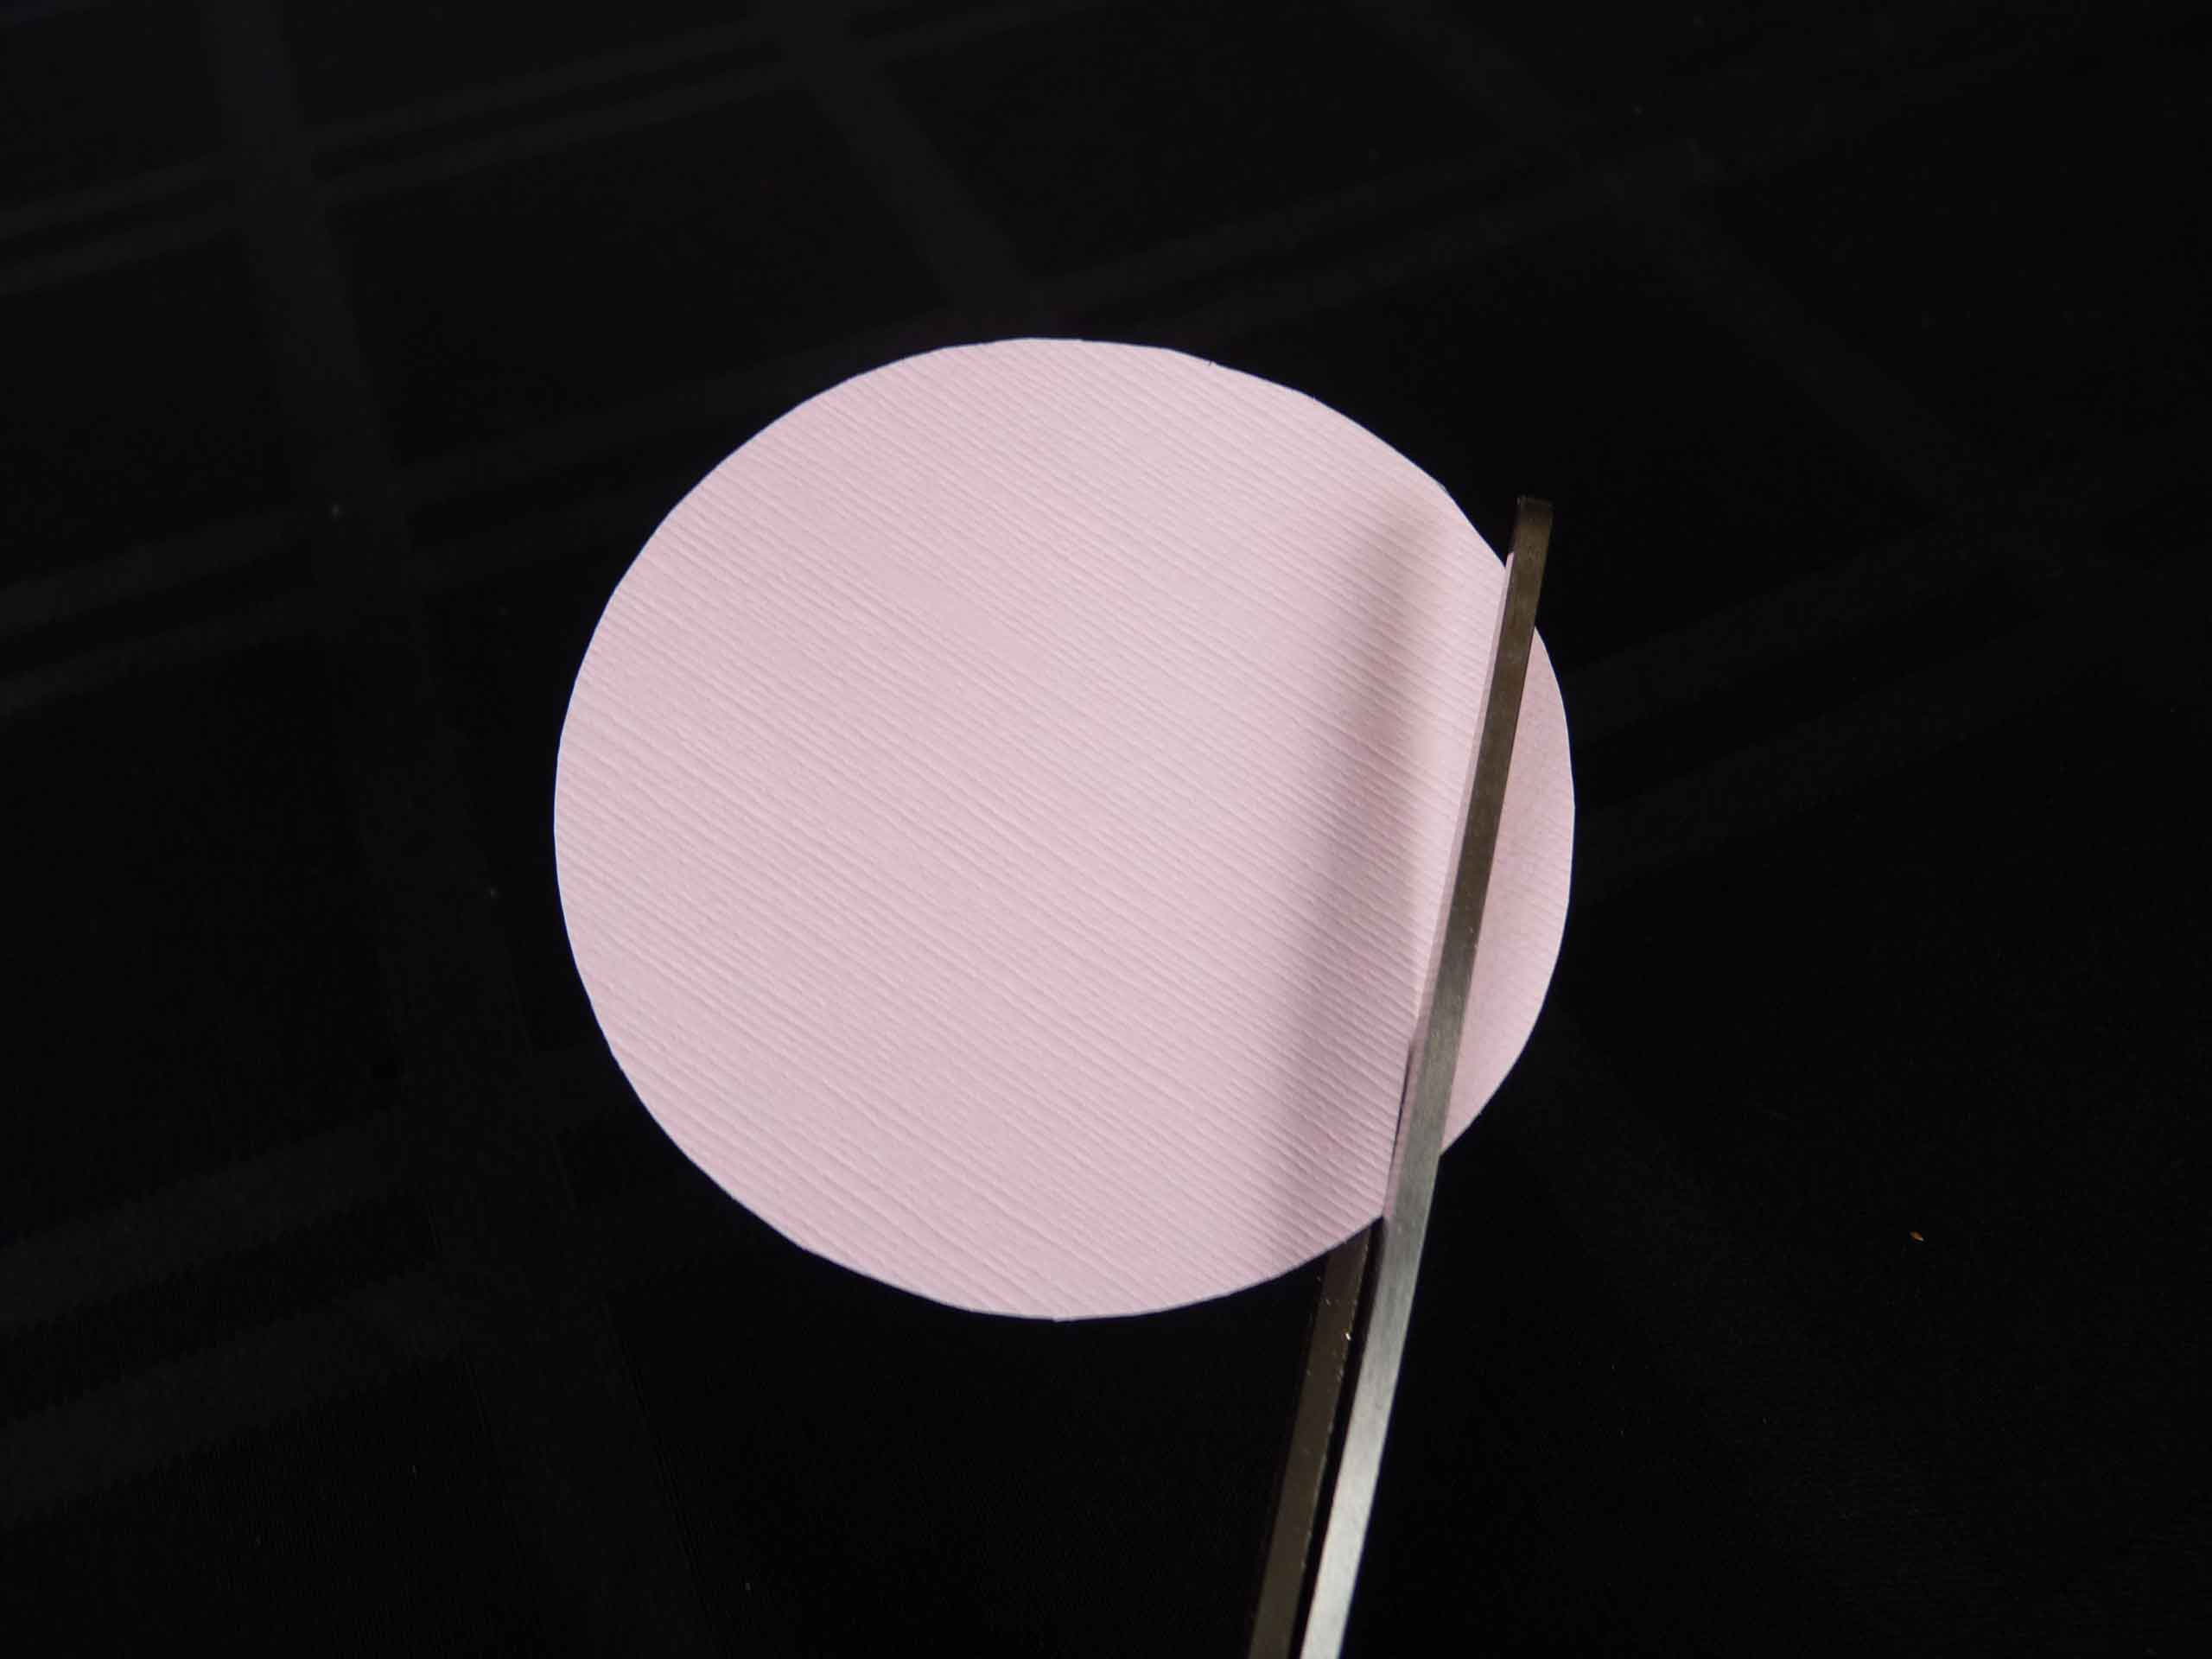
Start by tracing and cutting your circles. I made about 65 roses to cover my 6 inch styrofoam ball. If you have Cricut or Silhouette this part will go much faster for you! 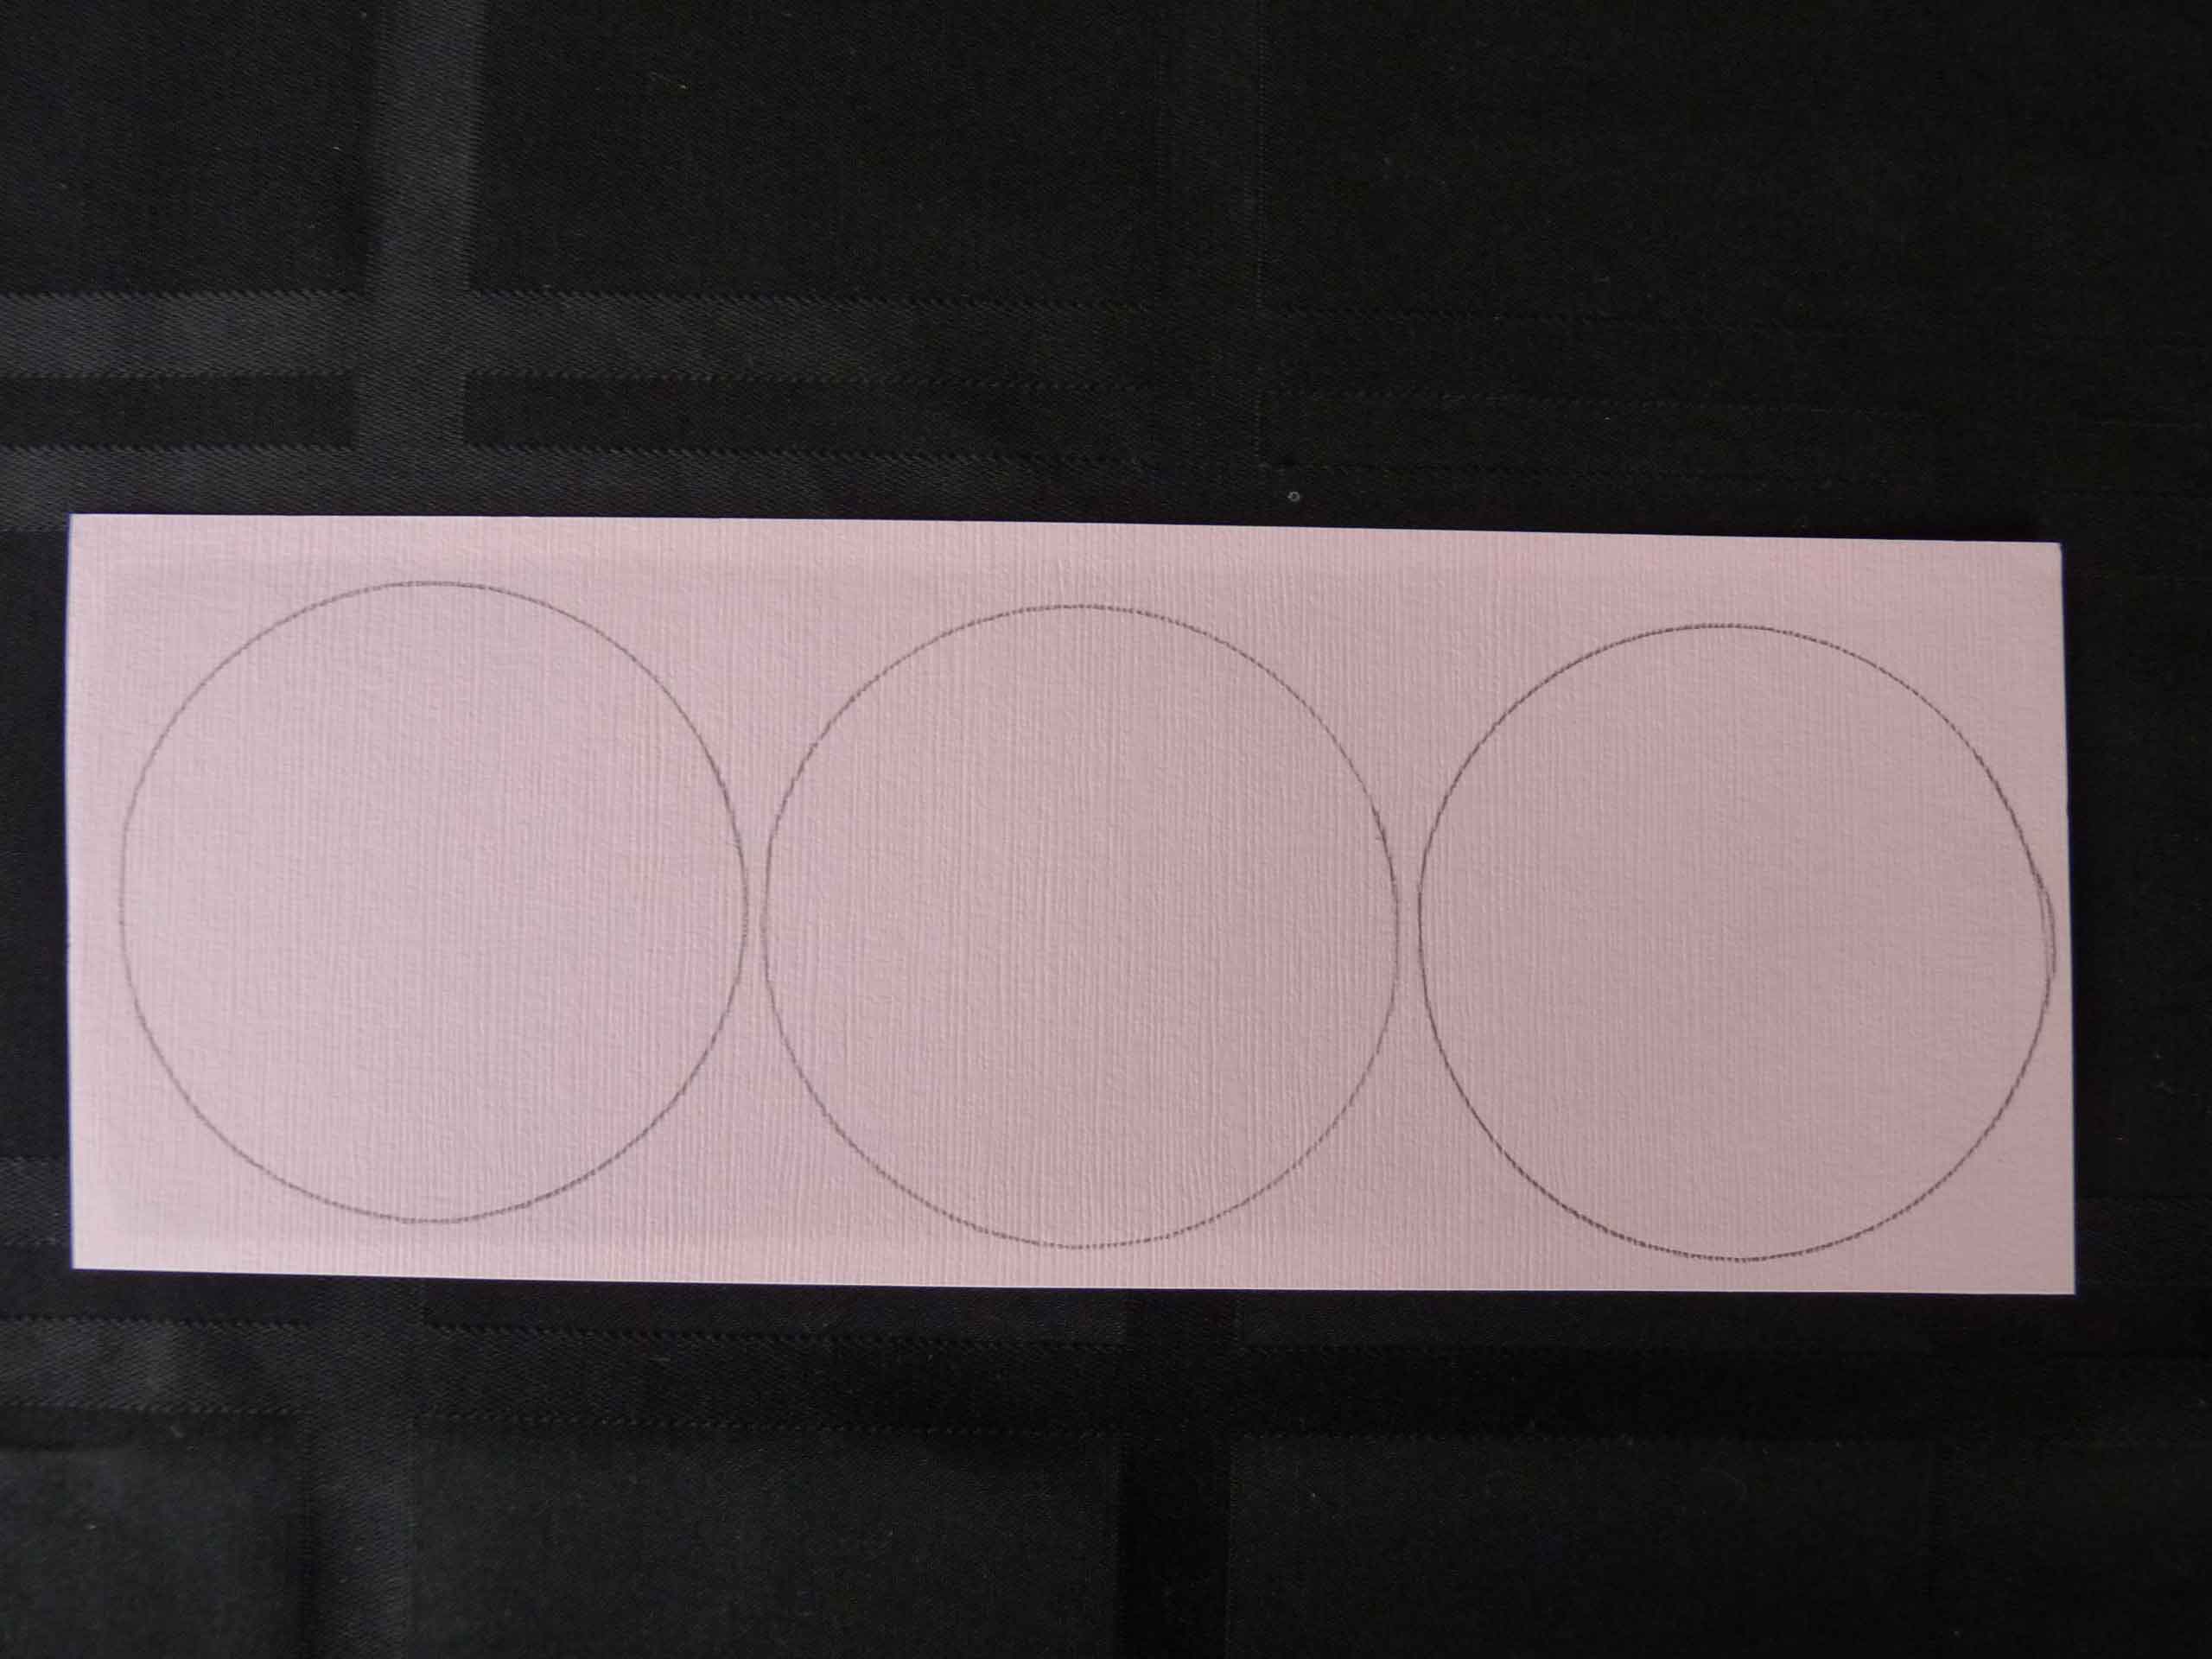
Cut your circle into a spiral. Here is the starting point
.
Continue cutting, don’t get too worried about it being perfect. It will not show when you roll up. Cutting the circle in a thinner width will give you more layers in your rose. I suggest practicing on a circle or two until you find the look you want.
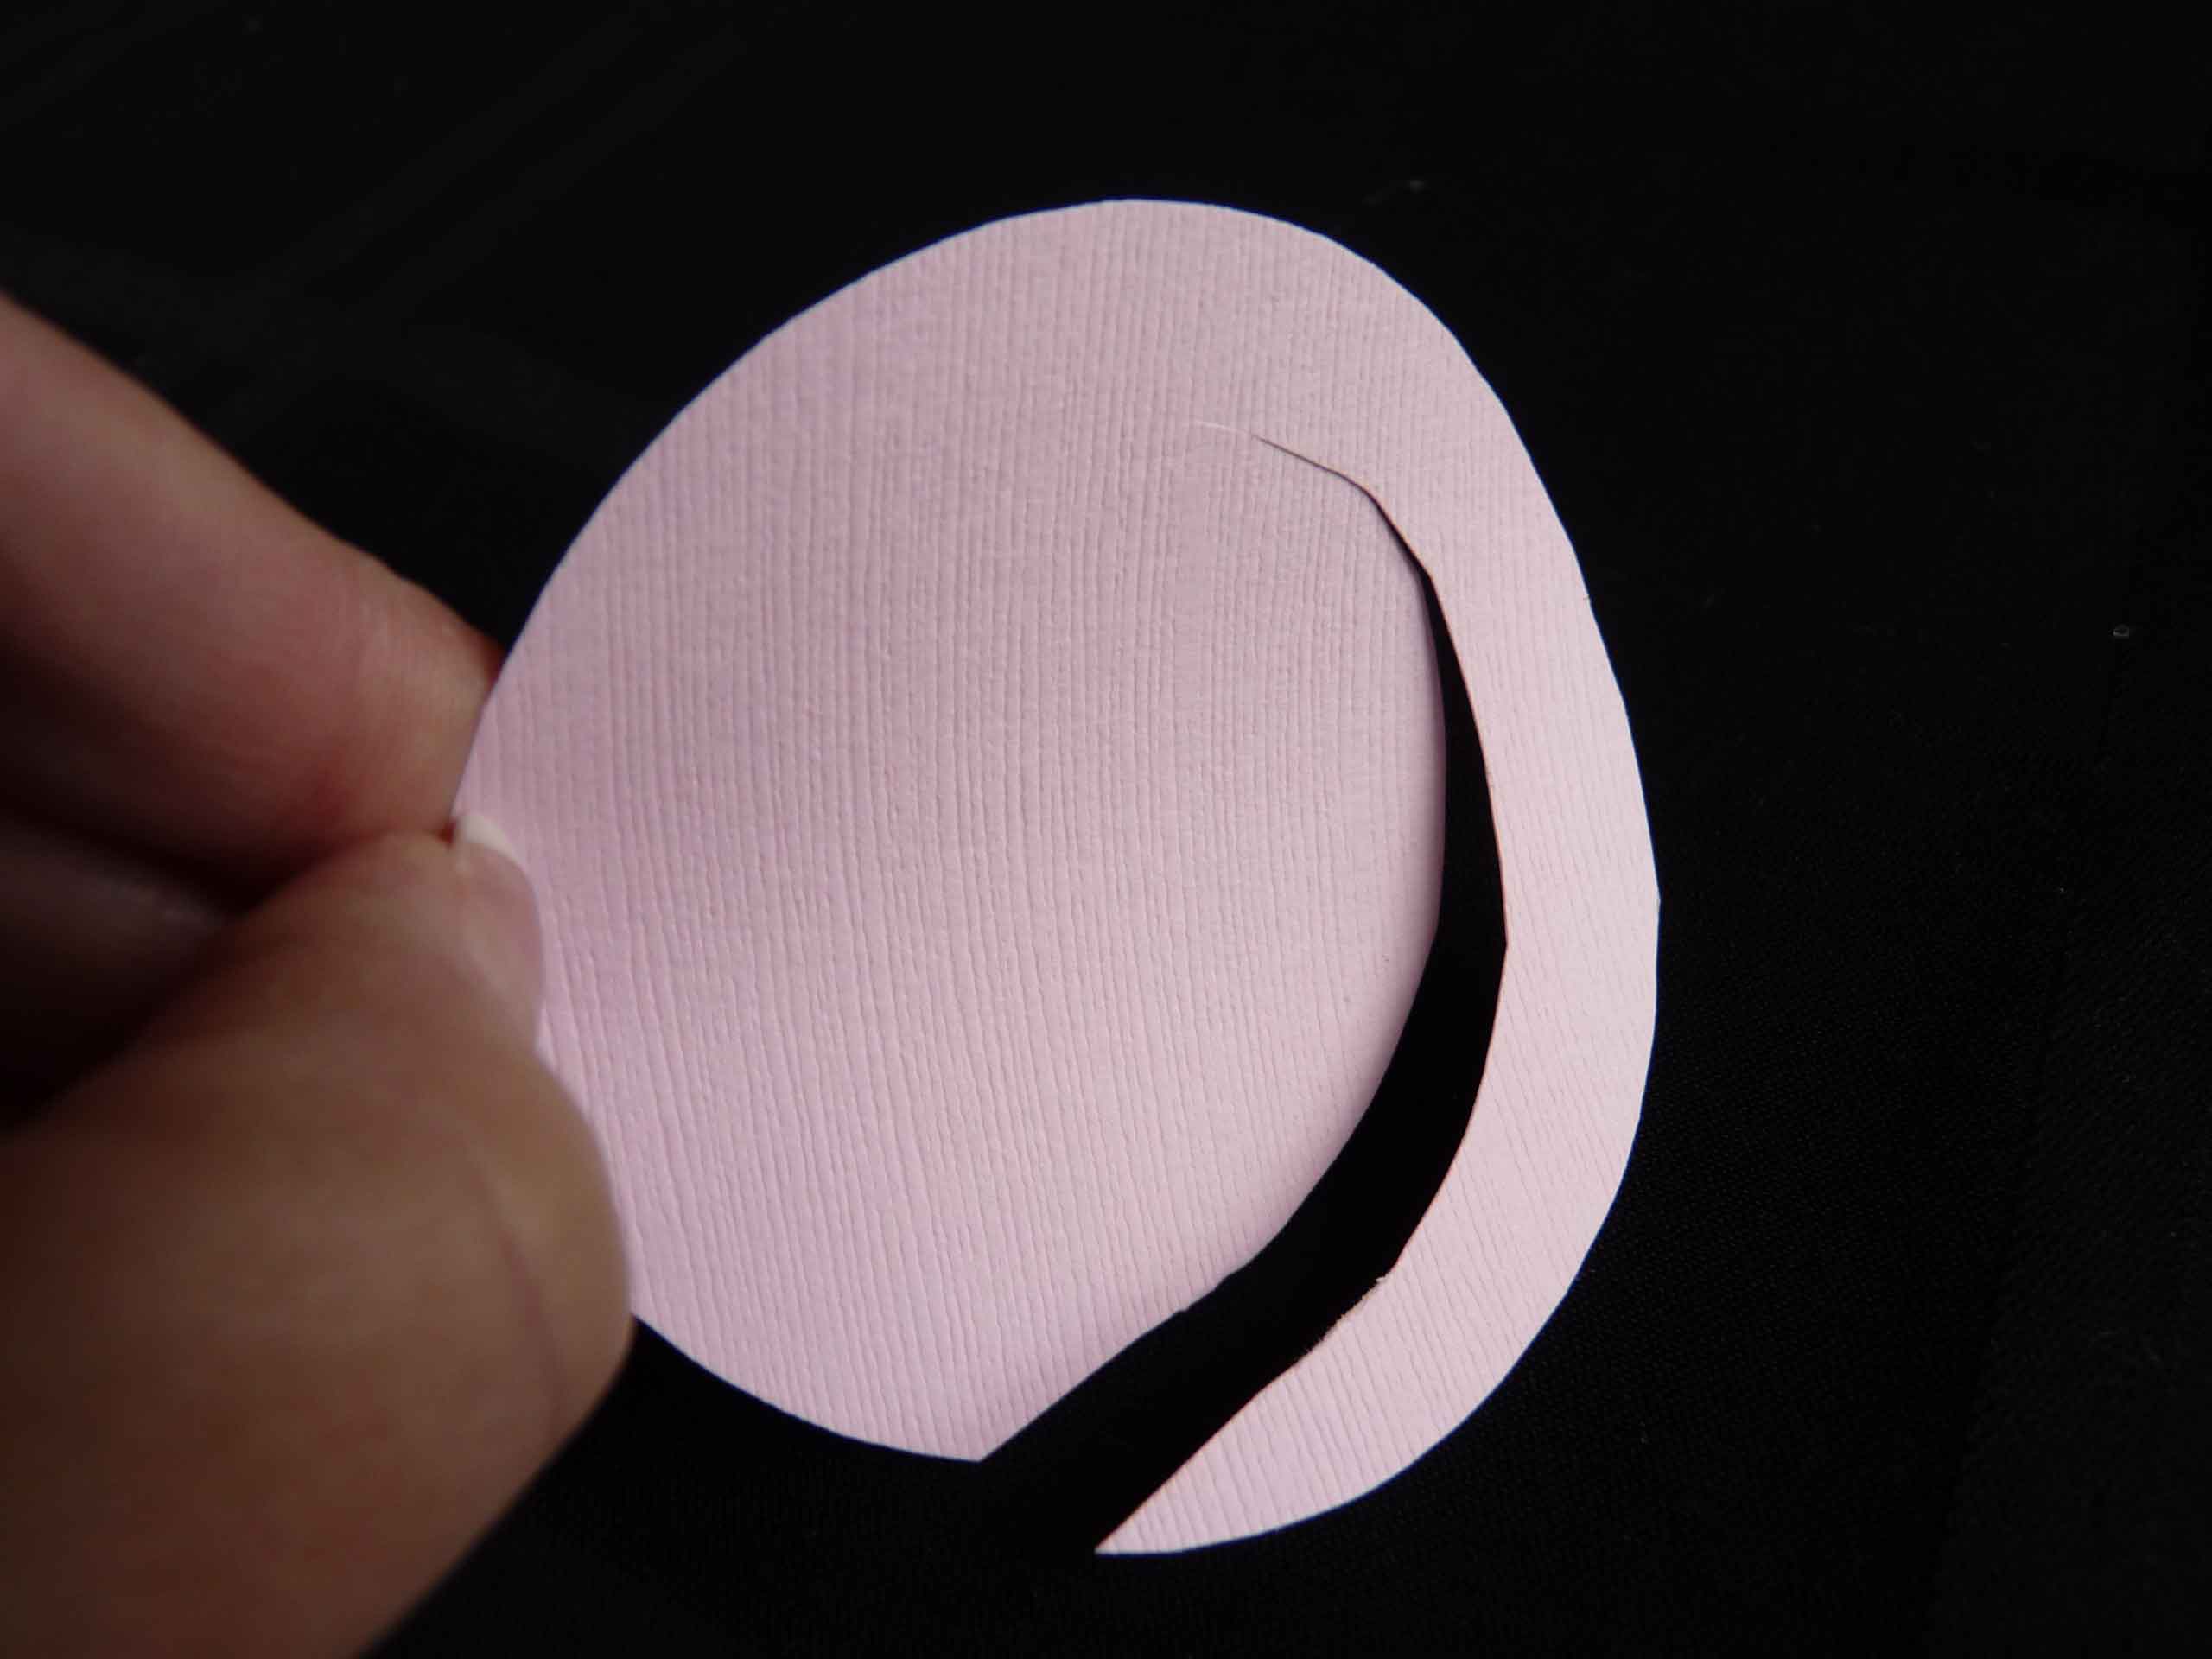
As you continue cutting you will arrive where you started cutting. Simply trim off the point and continue cutting.

Now that the point is cut off finish cutting until you reach the center.
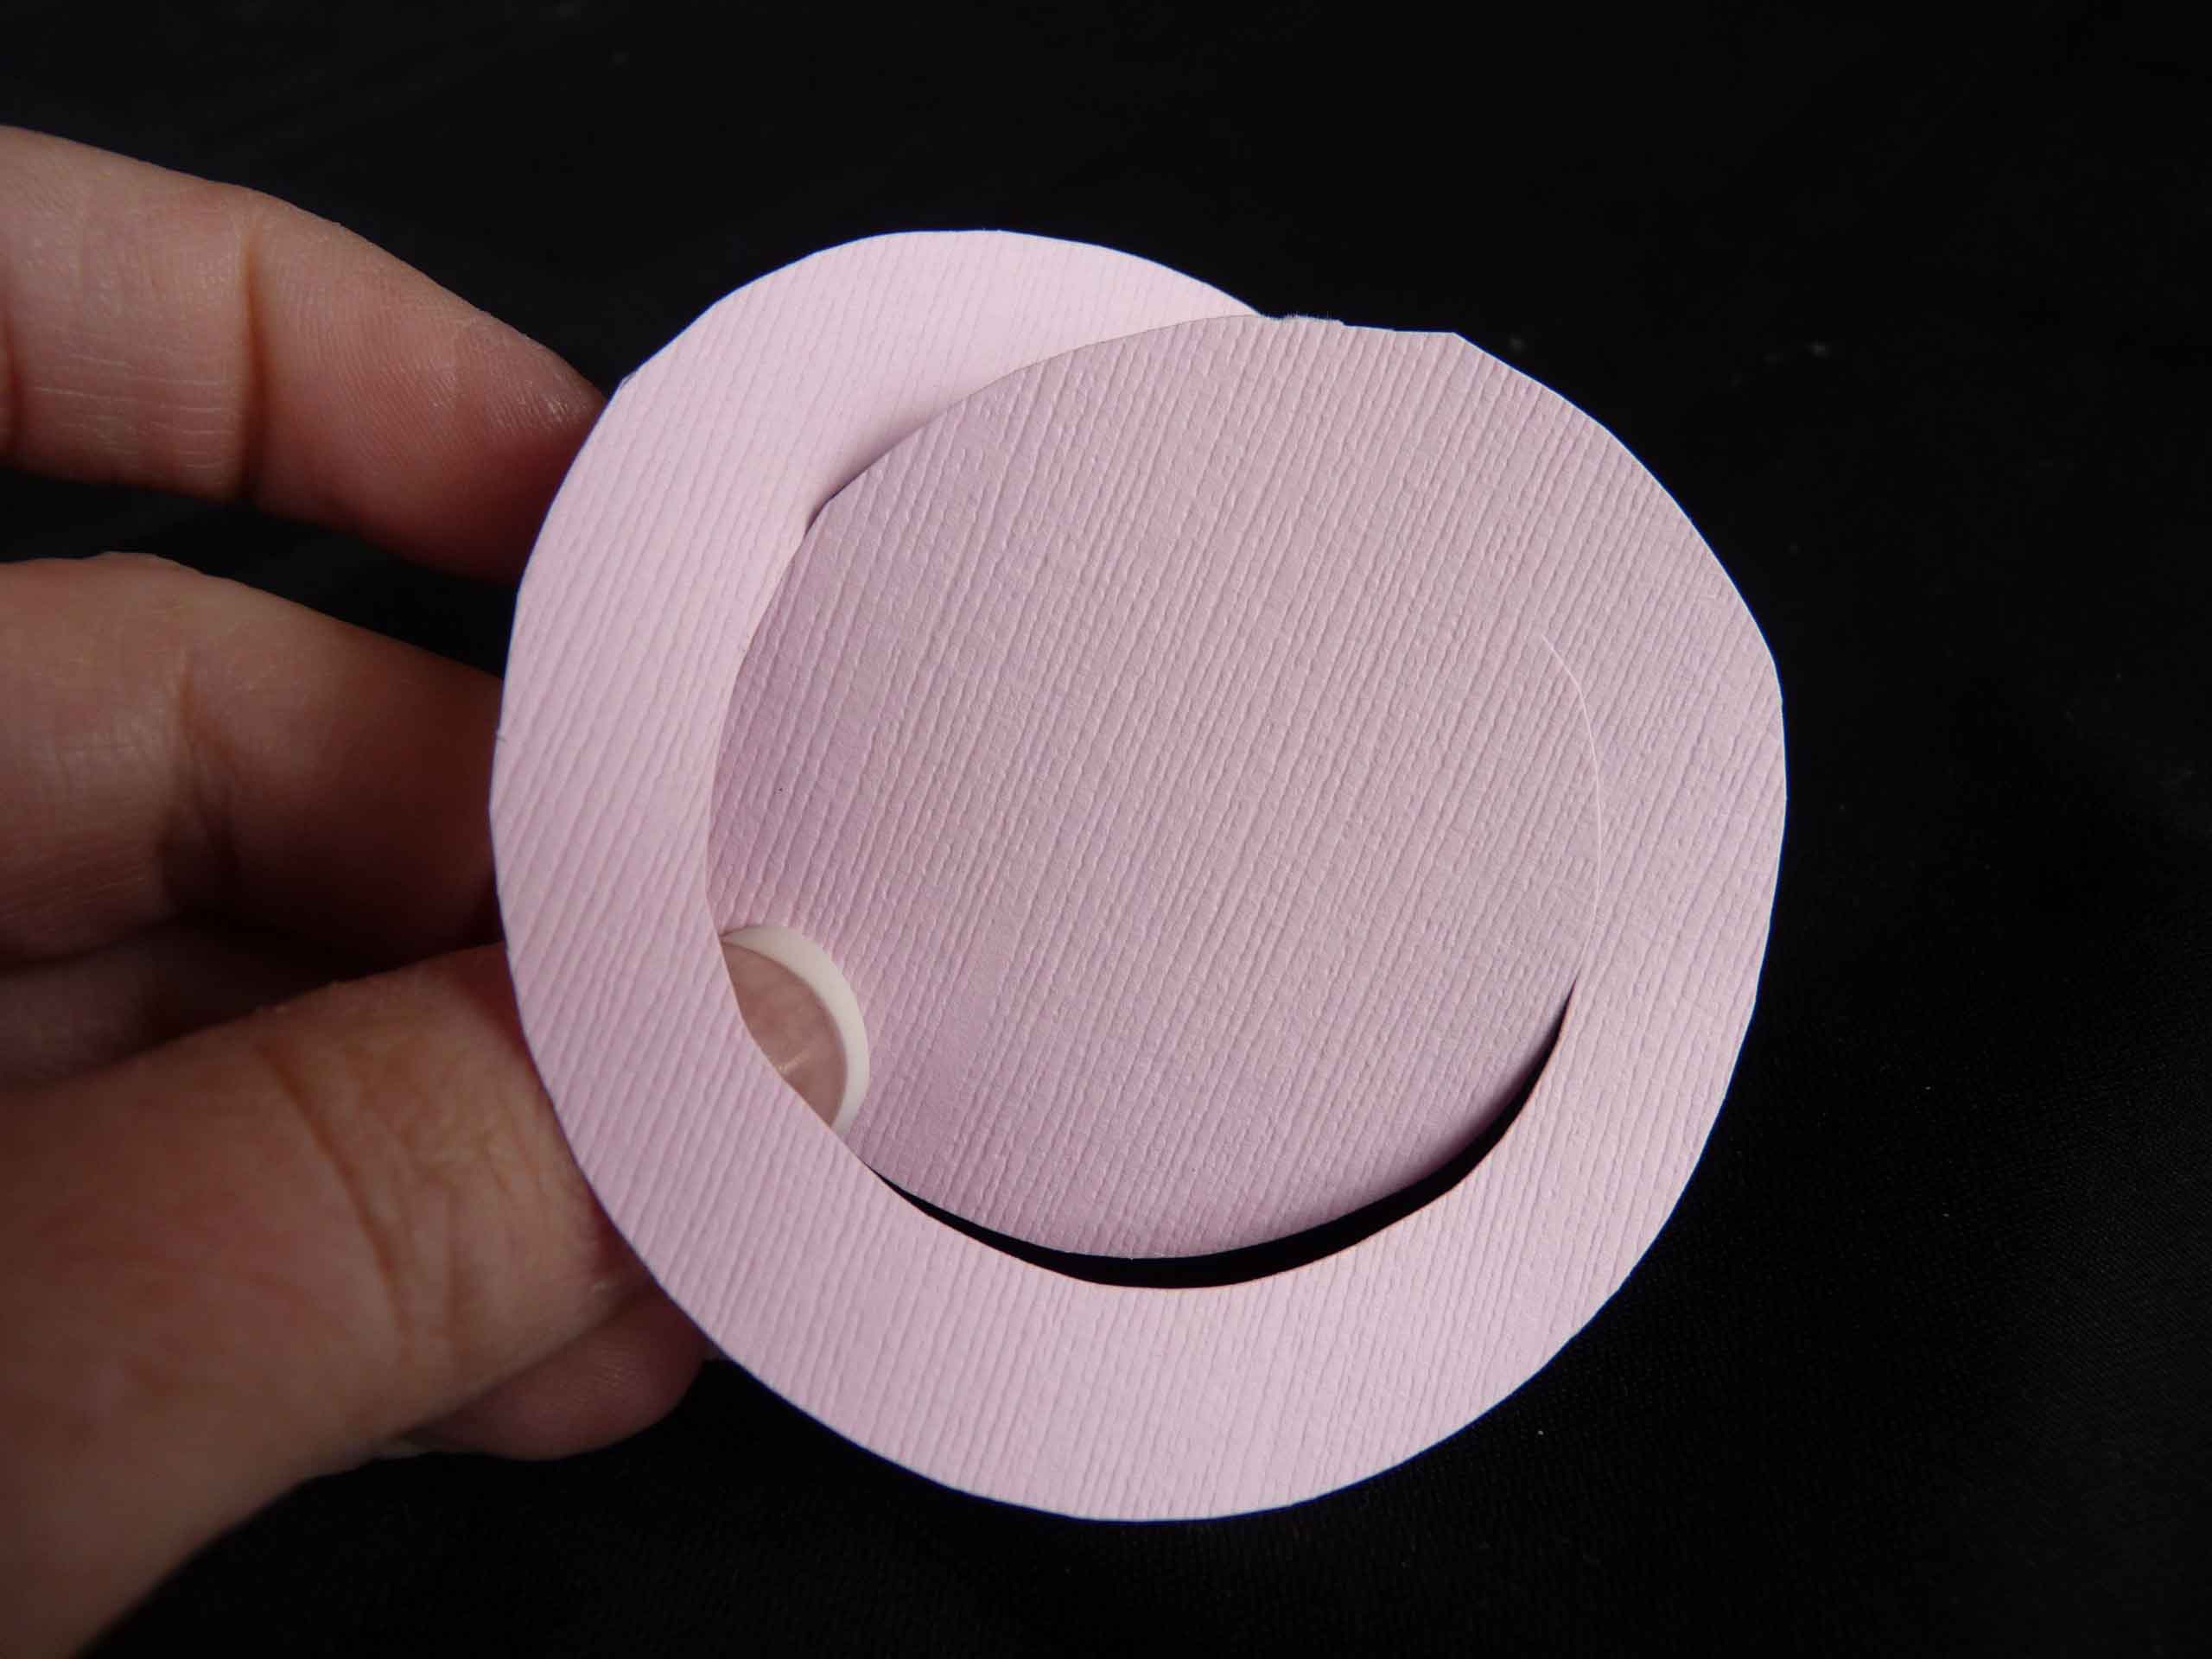
Start at the outside end and begin rolling till you get to the end in the center. Roll tightly for a more compact rose.
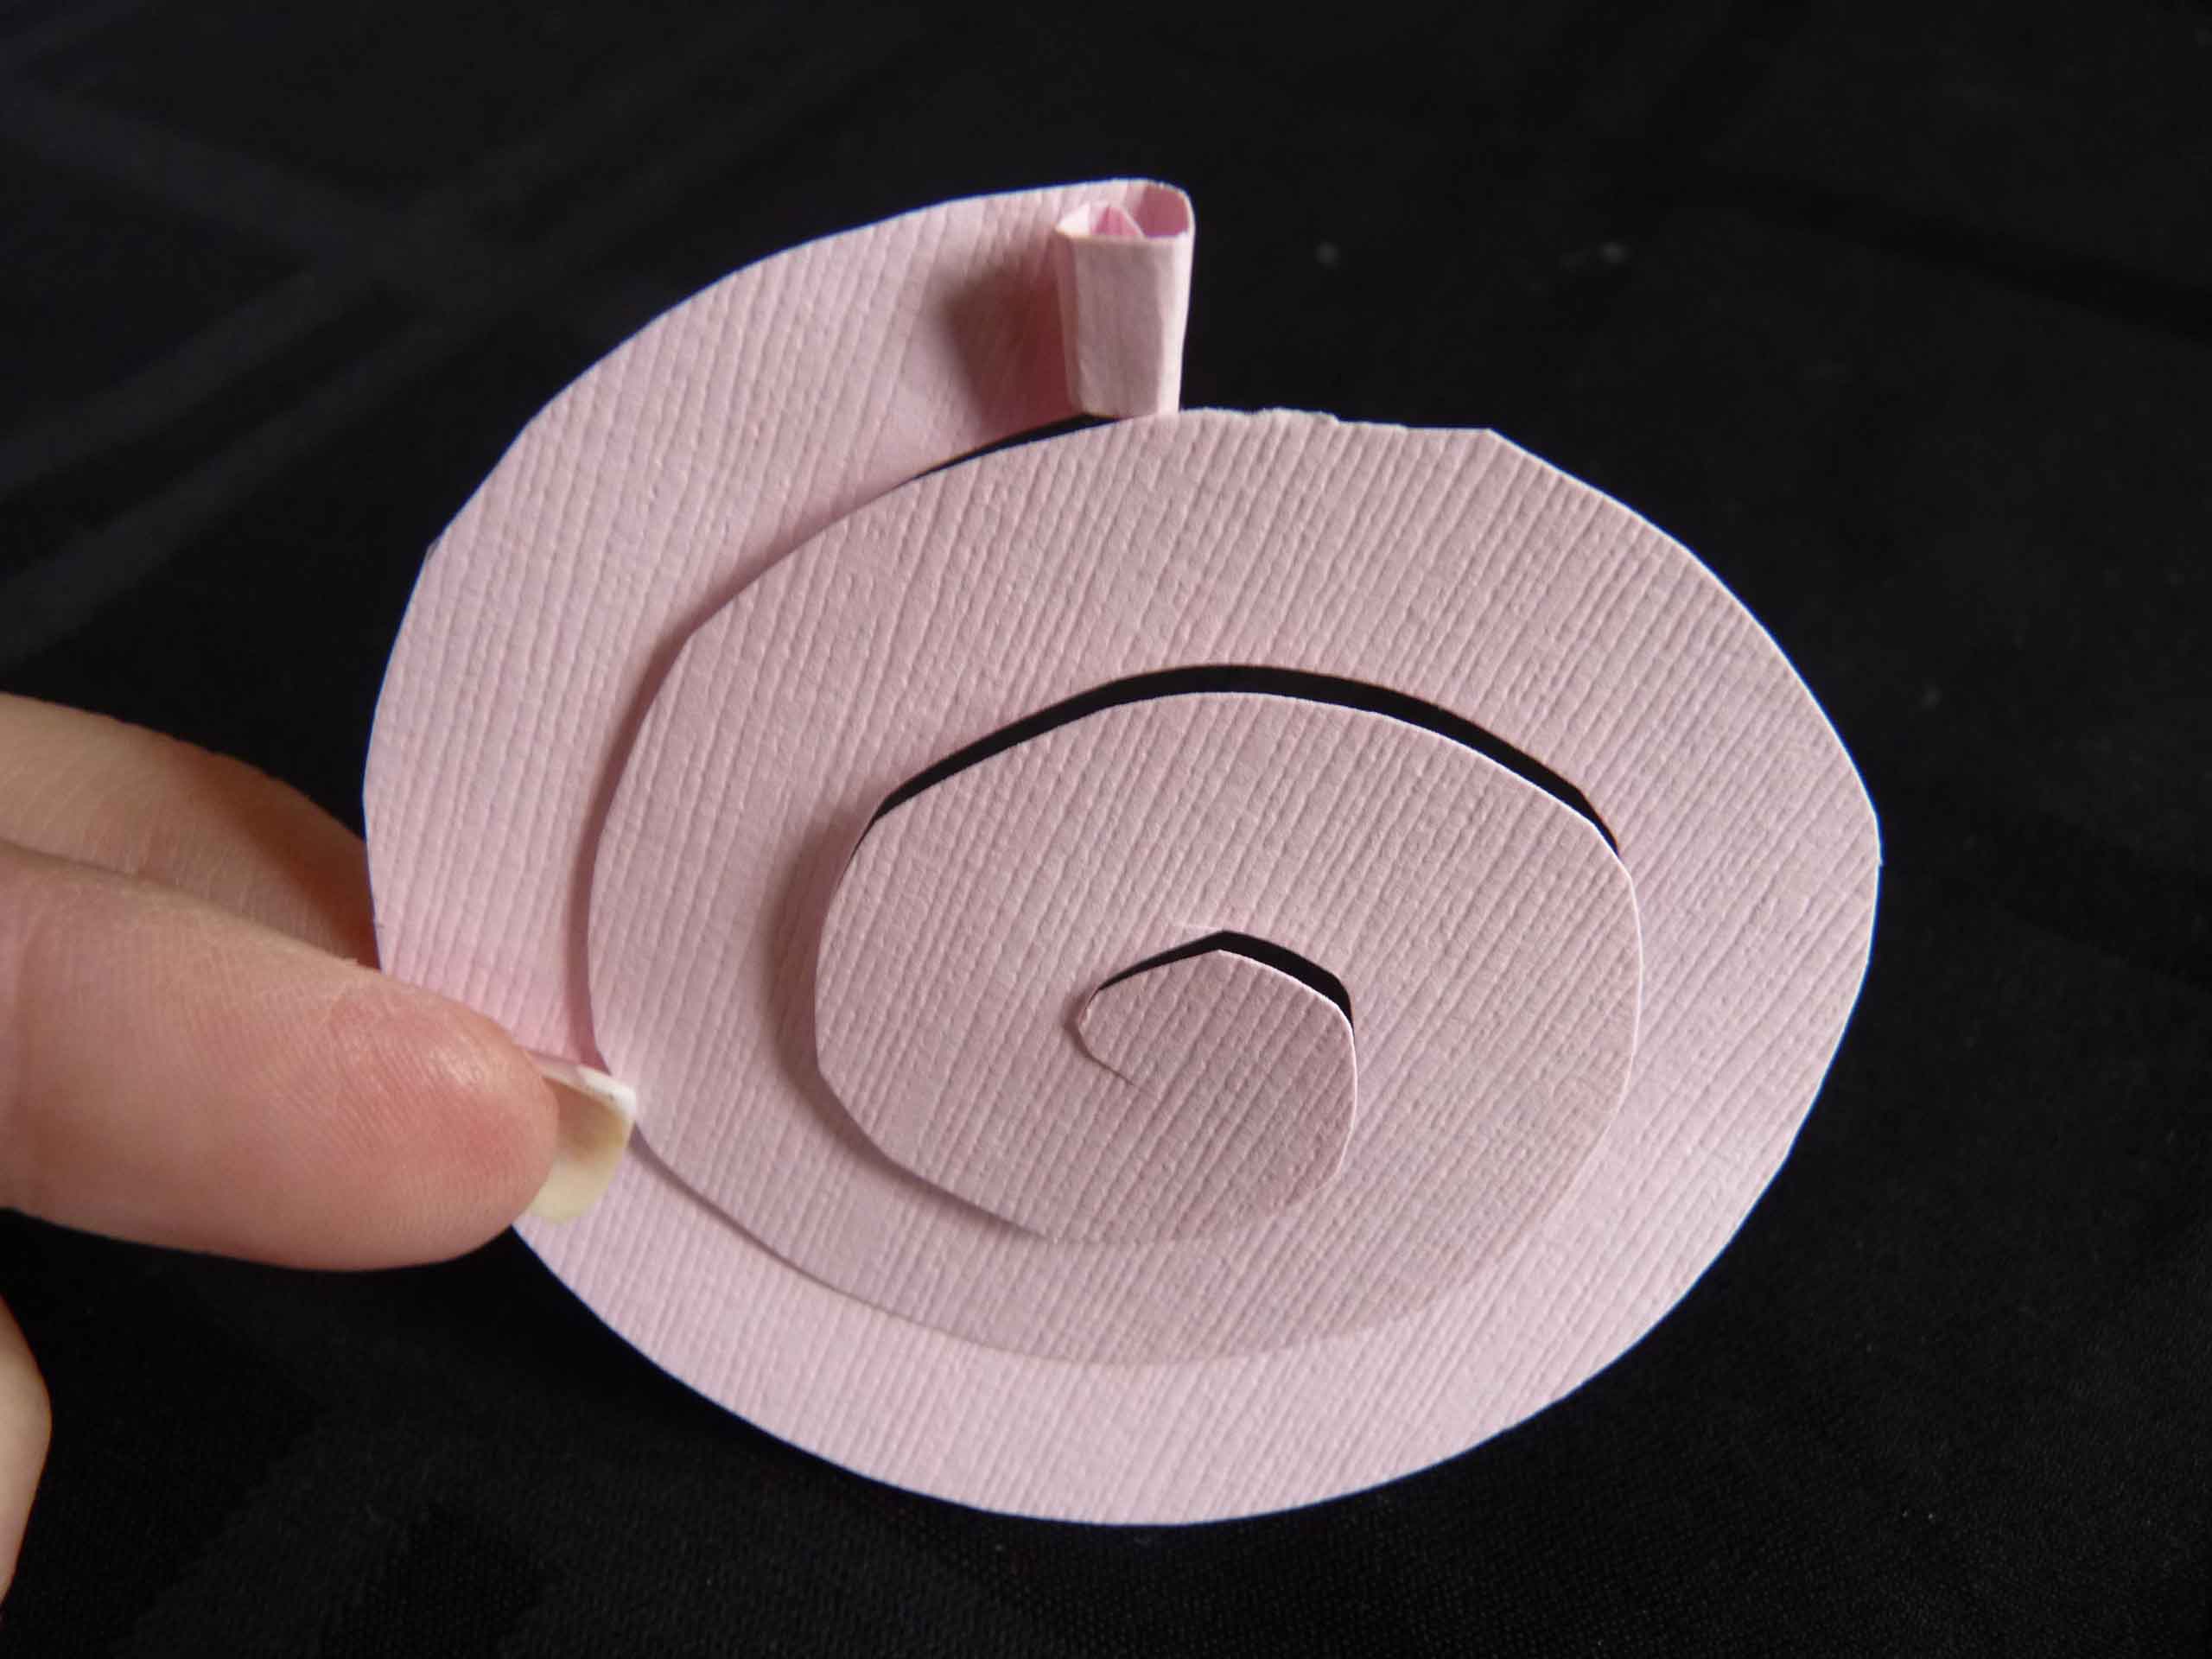
This is how it will look when you are finished rolling. It will take some time to get all of these rolled up, two episodes of Downton Abbey and half an episode of the Bachelor worked just right for me!

With a pearl tipped pin go through the middle of your rose all the way through the bottom layer of the rose.

Pin the rose to your foam ball. Pin the rest of your roses in a random pattern onto the styrofoam ball. Be sure to pin them close together so you will not have any gaps showing.
Once I had all my roses arranged just right, I used a light coat of spray adhesive and sprinkled a layer of very fine glitter. I just love glitter, when it comes to glitter I always think more is better! I let the glue dry and then placed my styrofoam ball on my glass candlestick to finish.
Supplies and Cost
- 6 inch styrofoam ball $5.99
- Scrapbook paper $1.99
- Glitter $1.99
- Pearl tipped push pins $2.99
- Spray adhesive $7.99
- Votive $.25 thrift store
- Scissors
- Pencil
Total $21.22
However, I already had the scrapbook paper, glitter, push pins, votive and spray adhesive. My only cost was the styrofoam ball, a whopping $5.99! So much beauty for such a small price……..
This Pin Totally ROCKS!
this is sooooo neat! I love it. You guys have so much talent. I’m constantly amazed at what you come up with and the projects you showcase. Great job!
Thanks Jeni. I have to admit I was really pleased with the way this turned out!
pretty
Really pretty. I’m thinking of trying this to use for my daughter’s wedding. My only question is–In the picture where you traced your circles on the paper, what size are those circles?
Cheryl,
The circles are 3 inches, you can control how many layers your rose will have by cutting your circle in a thin width for more layers. These would make beautiful centerpieces for your daughter’s wedding. Good luck to all on the big day !
Thank you so much!
Hi, i ordered my balls from amazon and had the 120mm (about 4 inch). When they arrived they looked a bit small. Only now seeing pinterest and becoming a member! Do you think the 4inch balls would look ok as centrepieces for my wedding or would you say to not waste my time and get bigger balls? Lol xx
Hi Terri!
Congratulations on your impending wedding! It’s going to depend on how large the tables are and if you are going to having any other items displayed with or around the Topiary. If you using smaller tables (4-6) and have other items with the Topiary, the 4 inch balls could work. If you are using larger tables (6-10+) I would go with the 6 inch balls. These will work beautifully for your wedding! Congrats again, Tracy