
 Hi Everyone! This is Melanie from Artzy Creations here to share with you, a fun Thanksgiving craft for kids. At our house, it’s typically a long day for the kids and they get a little restless waiting for the big Thanksgiving dinner. Not this year… I’ve come up with a clever way to create a turkey using just a few materials and some wood slices. I love wood slices and how versatile they are for so many crafts. Plus, they make the cutest darned turkeys.
This Wood Slice Turkey is great because you can have the pieces pre cut and put in separate bags for the kids to complete on Thanksgiving day. That really helps make this project extra simple, easy to distribute and manage on that busy day.

Supplies Needed:
- Wood Slices
- Red Felt
- Orange Felt
- Googly Eyes
- Tacky Glue (It’s great for kids to use for this project.) or Hot Glue
- Colored Ribbon
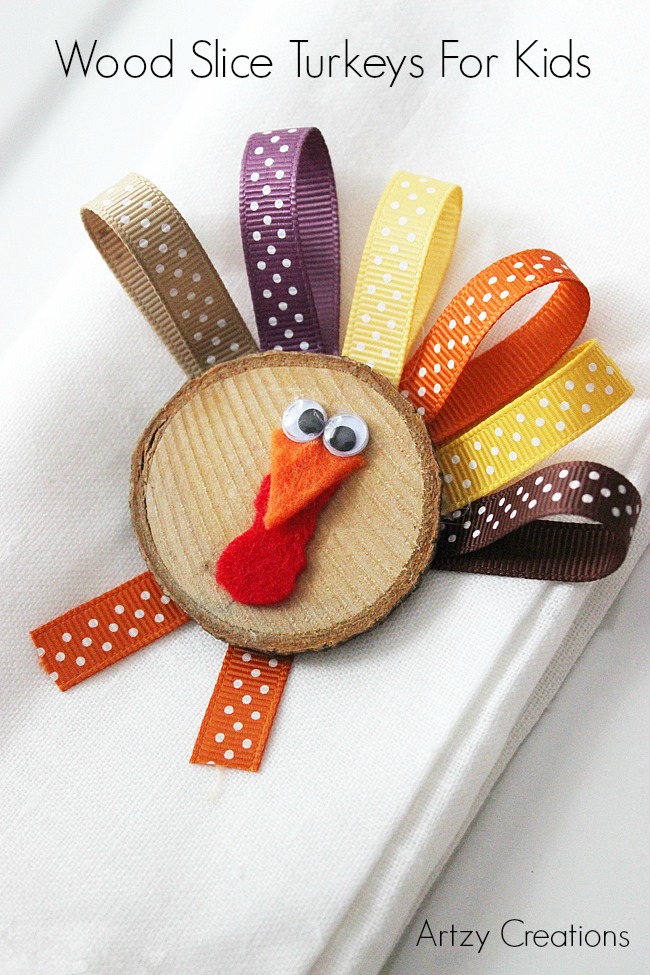
Step 1: Cut several pieces of different colored ribbon to roughly 3″ in length. Make a loop and place a dab of glue between the ends of the ribbon to glue them together.

Step 2: Glue the loops of ribbon to the back of the turkey and space them out just a little bit in a fan pattern.
Step 3: Next, you will create the legs of the turkey by taking two pieces of ribbon, roughly 1″ in lenght and glue these pieces to the back of the turkey. If you’re using ribbon with a pattern (like mine) make sure the pattern is facing the front so you can see it. You can angle the legs like I did or have them just go straight up and down.

Step 3: Take a little piece of red felt and a cut a curved waddle shape. Use a small piece of orange felt and cut a triangle for the beak.
Step 4: Glue the waddle shape down first. Followed by the beak. Finally, glue the googly eyes on.

Look at these cute turkeys. They will be a kid crowd pleaser for sure.

They are not only cute, but they make great a table decorations. You could also turn these into magnets for the fridge too.

I hope you enjoyed this project! I wish you and your family a wonderful Thanksgiving. I will see you all in December. Until then you can follow me for more craftiness fun at Artzy Creations or on Facebook, Instagram, Pinterest, Twitter, and Google +.

If you like this project, check out these fun projects too:


Borax Star Ornaments

Free Fall Coloring Page
Leave a Reply