• Home
  • About
    • About
    • Disclosure
    • Privacy Policy
  • Activities for kids
    • Books
    • Crafts
    • Games
    • Toys
  • Recipes
    • Appetizers
    • Breads and Rolls
    • Breakfast
    • Desserts
    • Dietary restrictions
      • Clean Eating
      • Gluten Free
      • Paleo
      • Vegan
      • Vegetarian
    • Dinner
    • Drinks
    • Just Crockpot Recipes
    • Lunch
    • Side Dish
    • Snacks
  • Grandma’s Lifestyle
    • Beauty/Makeup
    • Book Reviews
    • Crafts for Home Decor
    • Fashion
    • Get Me Organized! (Cleaning tips too)
    • Hobbies
    • Lifestyle
    • Nutrition
    • Relationships
    • Technology
  • Travel
    • Personal Travel
    • Places to take Grandkids
      • Midwest U.S.
      • Northeast U.S.
      • Northwest U.S.
      • Southeast U.S.
      • Southwest U.S.
  • Reviews on kid stuff!
    • Books
    • Games
    • Toys
  • Holidays
    • Christmas
    • Easter
    • Halloween
    • Misc. Holidays
    • New Year’s Eve
    • Patriotic Holidays
    • St. Patrick’s Day
    • Thanksgiving
    • Valentine’s Day
  • Service Opportunities
  • Free Printables

Activities Crafts Crafts for Home Decor Lifestyle

How To Make Tissue Paper Flowers

Pin
Share
Post

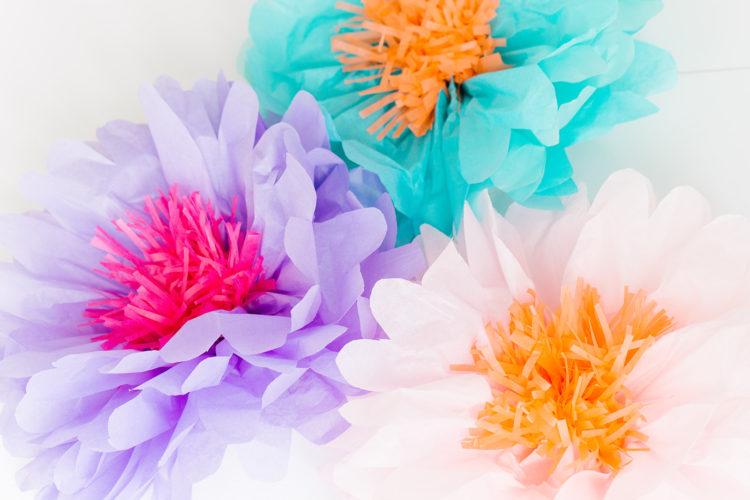
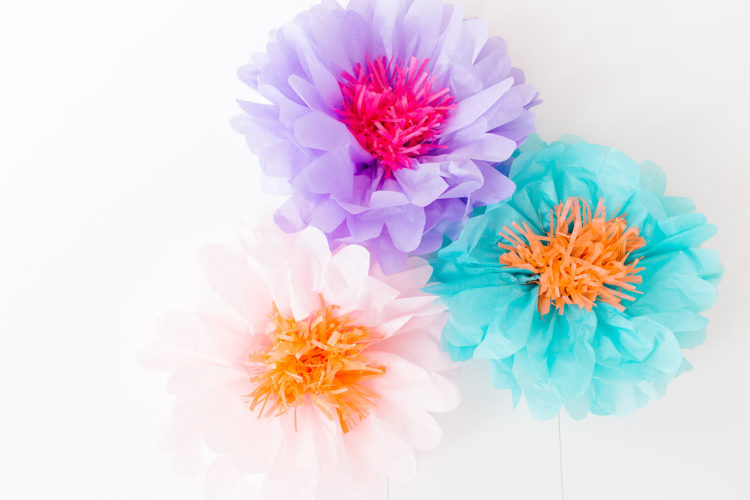
Hello TGIF readers!  On our blog today we are going to show you how to make tissue paper flowers.  These are easy enough to have little kids help and they make darling decorations for a girls room.  Our examples below were made by a six year old to give you an idea of the age that can help.  Aren’t they beautiful?

Tissue Paper Flowers

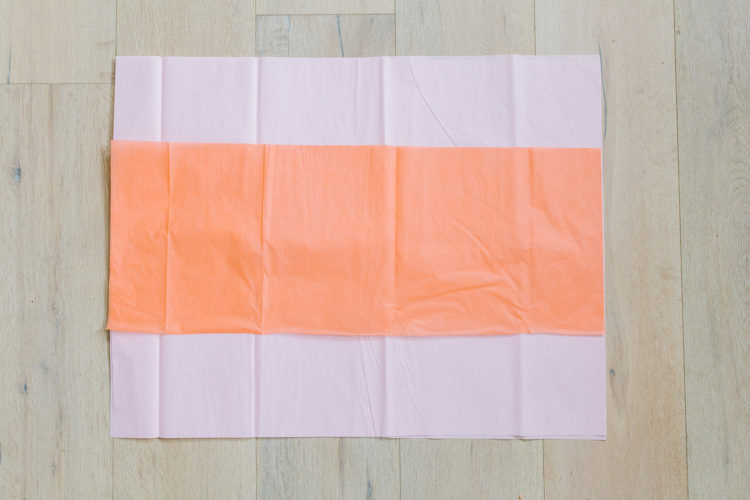
To make these you will need four sheets of tissue paper, (three of one color and one of another color) some color coordinating pipe cleaners, some scissors and a ruler.

Lay down three full sheets of tissue paper with one half sheet of tissue paper in another color centered in the middle.

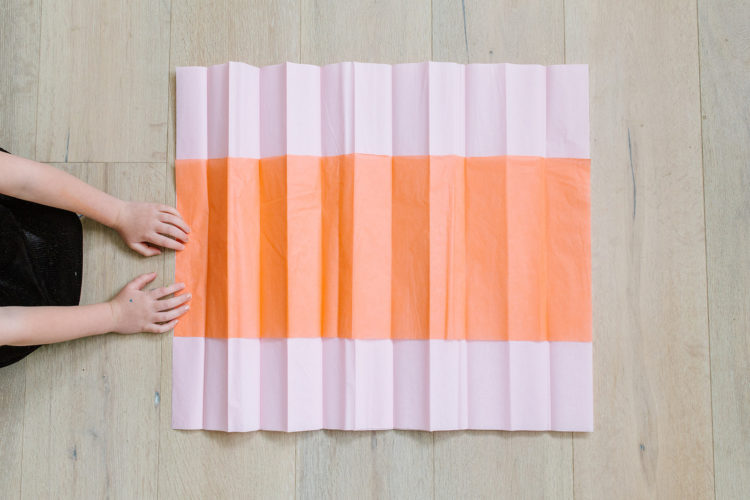
Next you are going to want to fold in two inch increments. Fold one way, then turn the paper over and fold the other way.  Repeat until you end.

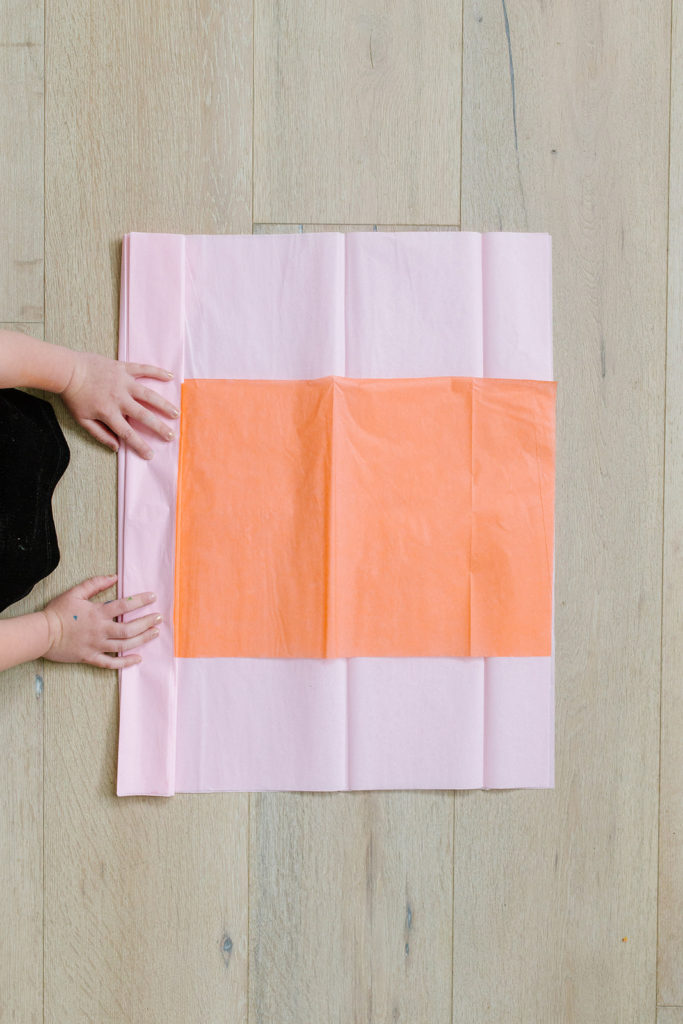
Flatten out your tissue paper after folding.

We are now going to cut some fringe on the center piece.  Carefully remove center piece and fold it back together accordion style.  Cut each end with small cuts (about 1 1/2 inches) to create fringe.

Open your middle piece tissue paper back up and place it back on your full sheets.

Fold everything back up again and then fold in half.

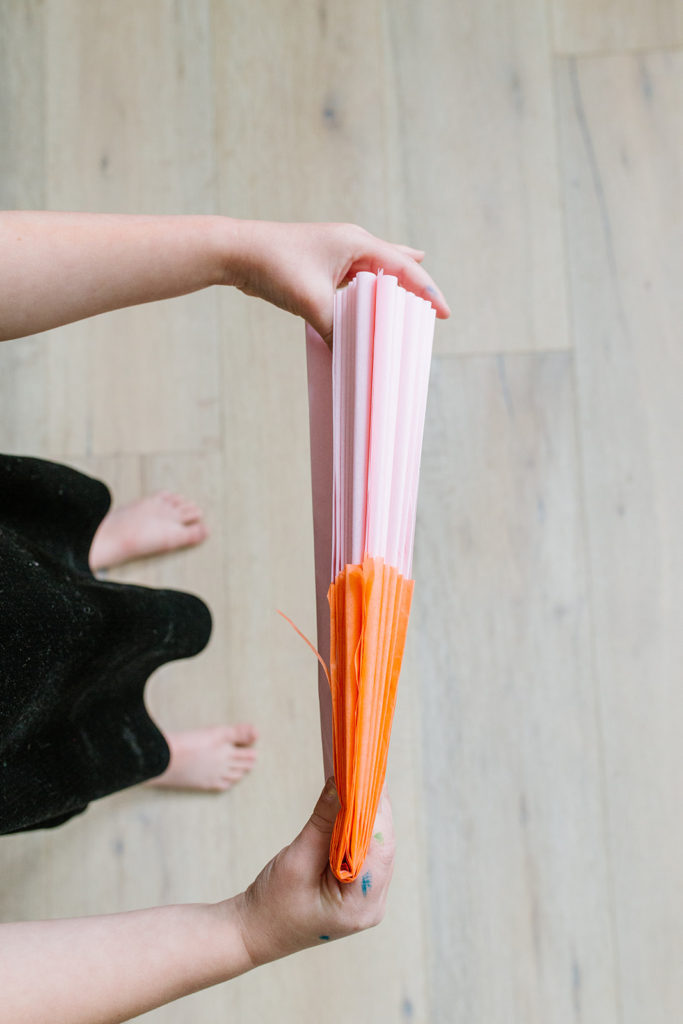
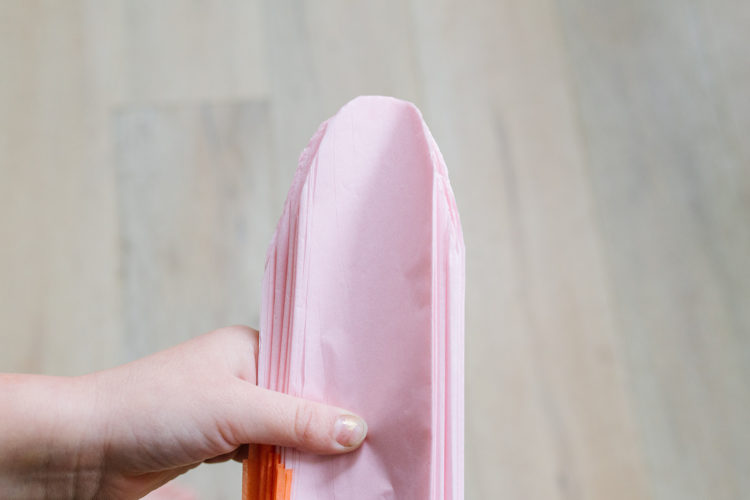
Taking your scissors, cut half circles at the end of your tissues.

Open your tissues and place a pipe cleaner in the middle.   Twist tightly but don’t pinch the middle.

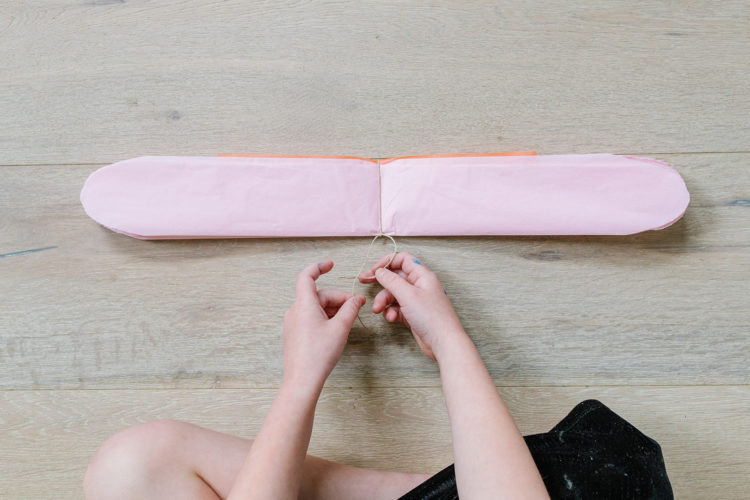
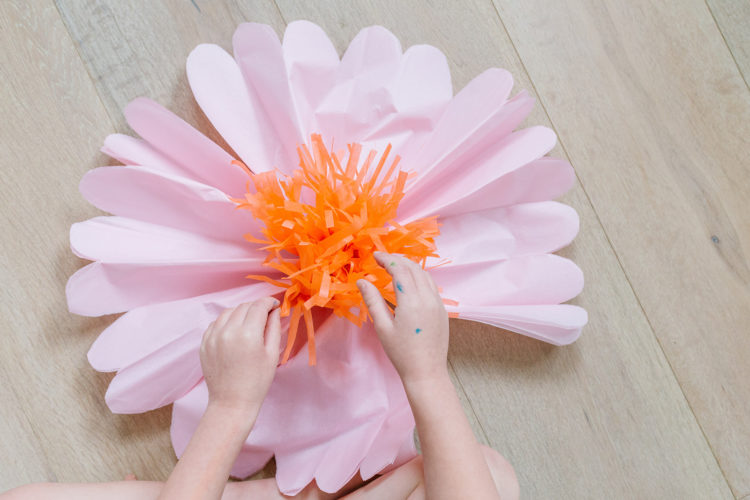
Open up your flower and start fluffing the tissue paper one side at a time by pulling the layers of tissue paper apart.

Now that you know how to make tissue paper flowers, they are ready to hang.  Use the pipe cleaners in the back to attach to a rod if you’d like to stand them up.

Tissue Paper Flowers

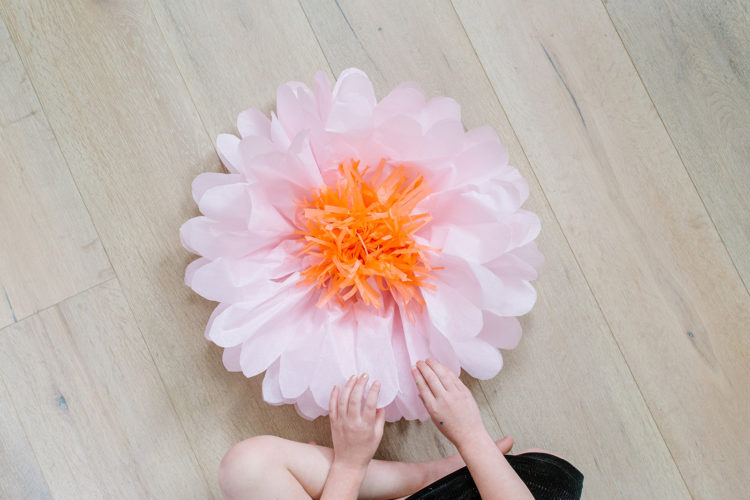
These are fairly large as you can see in the pictures and make a beautiful look on walls.


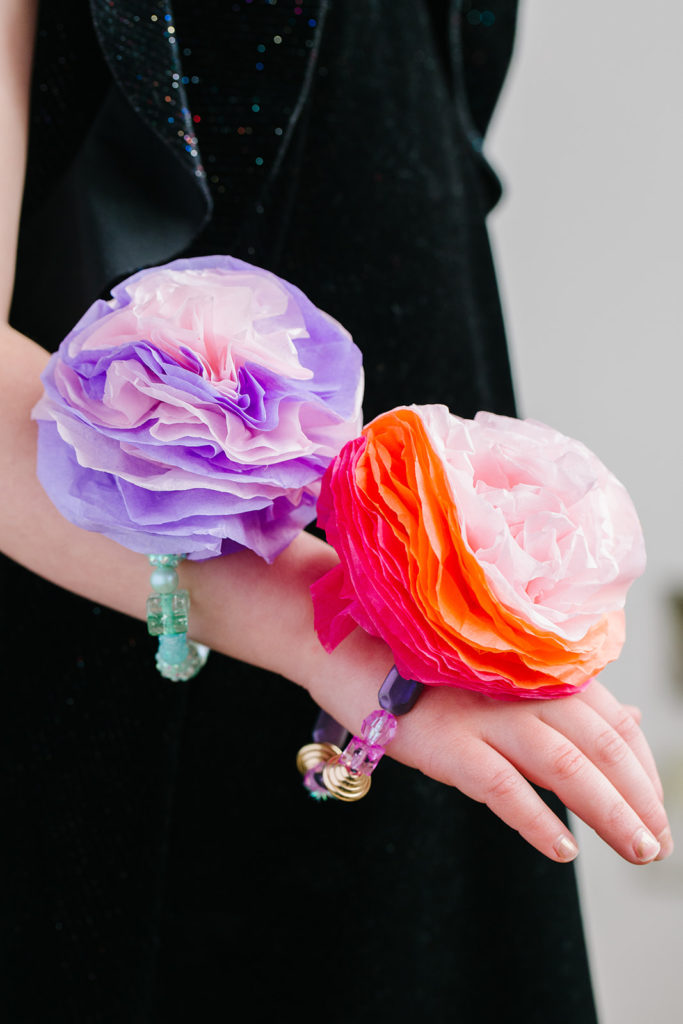
You may have some tissue paper left over so here is another fun tissue paper craft!

Tissue Paper Flower Bracelet


How To Make Tissue Paper Flowers


Tissue Paper Flower idea by The Crafty Mom

Pin
Share
Post


Leave a Comment

« Patriotic Paper Chain
21 Irresistible Backyard Play Areas »

Leave a Reply Cancel reply

Your email address will not be published. Required fields are marked *

Recipe Rating


Welcome to TGIF – This Grandma is Fun!

GrandmaDTS
Come join Sherri, Tracy and Debbie as we share fun ideas to do with grandkids! With 12 grandchildren between us (and more to come!) we are loving this time of life and want to share what we are doing to make lasting memories and to uplift and support our families. We hope you come back often!

Copyright © 2025 · THIS GRANDMA IS FUN · PRIVACY POLICY